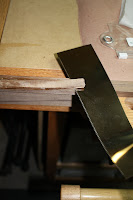
While making a simple applied frame for a mirror, I had to flush trim an edge to the main frame face. Duh, how easy?! Thing is, I didn't notice that one piece to flush had a crack in it. The second the router bit hit it, a pretty large chunk splintered off. This is how I fixed it, which didn't look as good in the end as I hoped, but I'll tell ya afterwords how it could have been done correctly.
Next, I had several thin strips of walnut from the bandsaw in the garbage so I pulled them out (for the curious, no, I don't empty the cutoff garbage very often ;)
Basically, I made a kind of bent lamination of the strips into the recess. You'll see that the frame and these strips have a lot of sapwood in them. I really don't care about the sapwood as I'll equalize it with dye then stain and glaze it with General Finished Black Walnut to match an existing vanity... though it makes this repair look bad later :)
Voilà, walnut sandwich in the recess.
Clamp the sandwich like a Dagwood...
...and later marvel at how you turned an ugly recess into a hideous wood wart!
Flush the surfaces with a flush trim saw. Note that this laminate will likely chip out more than the original cracked wood if you hit it with a router. Even with a spiral bit. The initial chip out was from a spiral bit.
Voilà the result with some mineral spirits to show the color. As you can see, it is pretty painful from a color matching point of view, but I'm equalizing the sapwood and heartwood with dye later. As I write this, I've already glazed them and honestly I have a difficult time finding this repair.
How to do it better if you are clear coating? Well, for one, I would have picked thin slices that were all heartwood so they would have a consistent color. Second, depending on whether or not all sides of the repair are visible, I might consider laying shorter slices deep in the recess then top with one that will form the entire visible portion of the repair. This method, though, might show small voids on the side facing you in the picture and that may not be what your project can tolerate. In my case, that side is the side mounted to a wall a could easily tolerate small voids to make a better show side.
Best repair? Notice the crack beforehand and hit it with cyanoacrylic...


Wow, blog overload. I think you are trying to make up for not posting for almost an entire month. I am looking forward to seeing the pics and videos of your trip.